The Bm chord is one of the very few chords that is both very, very common, and very, very difficult for beginners to play.
By the time you’ve finished reading this page, you will learn:
B minor is one of the first chords that, when you look it up in a chord book, usually the first result that you see is this difficult chord with what’s called a barre shape in it.
Like this:
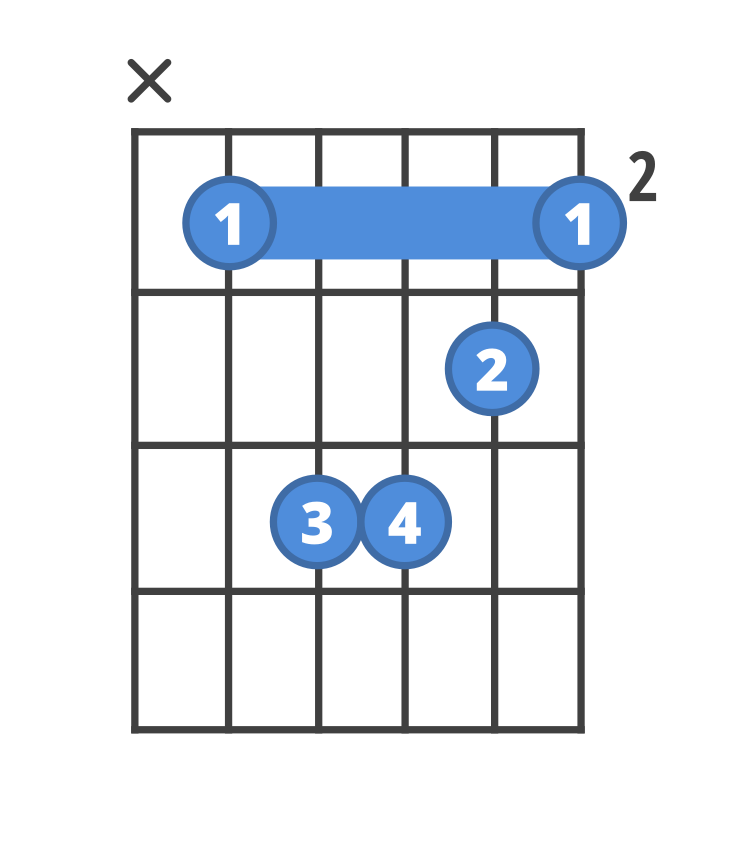
If you’re just startign out, that diagram can be pretty intimidating. What’s the rectangle between those two ones for?
Here is a photo of what that chord looks like in real life:
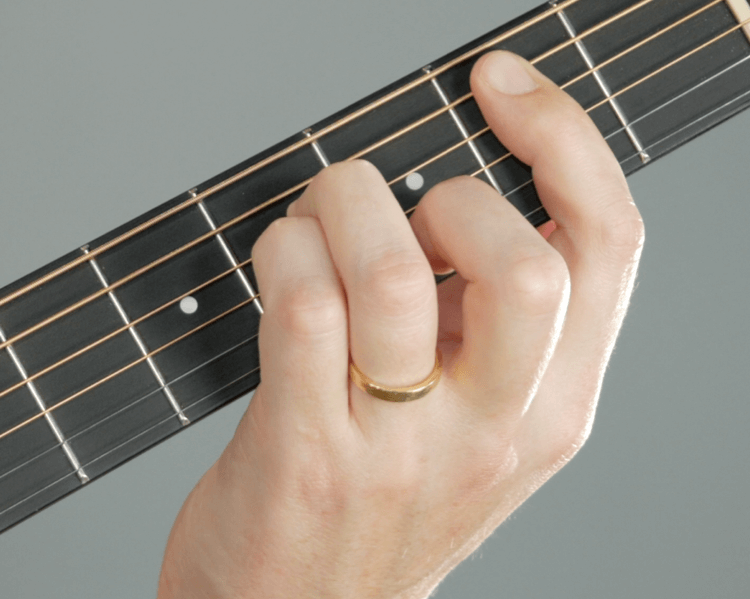
You can see that the first finger starts on the fifth, second-thickest string, but it is laid flat down and pressed down all the way down to the first, thinnest string.
This is called a “barre”–playing more than one string with the same finger.
Chords that have these barres are called barre chords, and they trip up just about everybody during their first few weeks and months of playing.
Most of the common chords you’ve learned—chords like D, chords like G, chords like A, they’re not so difficult to play. They only need three fingers, they have a lot of open strings.
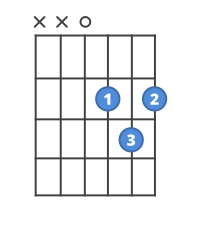
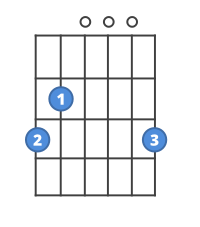
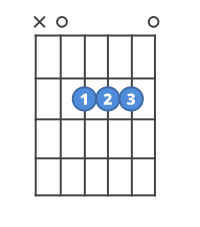
With these easier chords, each finger is pushing down on one single note. So, in the D, G, and A chords you already know, each of your fingers is touching a single string.
With a barre, though, you are taking one finger, and instead of putting your fingertip on the string, you’re flattening out your knuckle, and laying your finger straight across more than one string at a time.

If that weren’t hard enough, while you’re doing that, you also have to put some combination of the rest of your fingers on the rest of the strings.
Which is often too difficult a thing for a beginner guitarist to learn.
So there’s three different versions of Bm that you should learn, and they all come from the difficult one. But they’re made a little bit less difficult one, each time.
Don’t worry–there is a version of B minor that you can learn right now, that is as easy to play as the other beginner chords you learned.
Here it is:
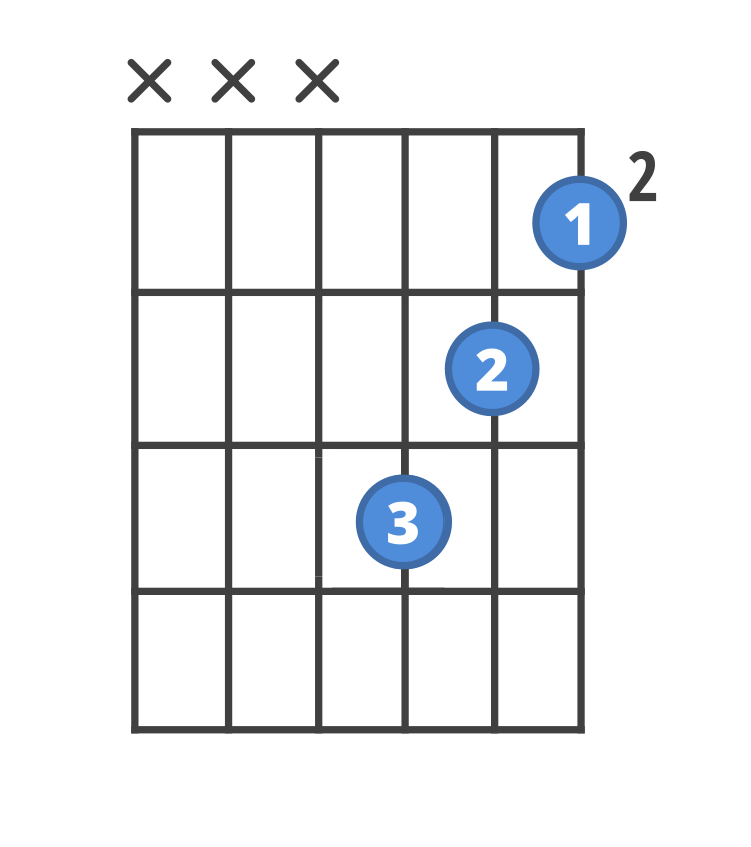
Why is this easier?
Let’s take a look at this chord, next to the diagram of the fully barred version we saw before:


You should see that we’re just playing the notes from the thinnest three strings. It’s like we took the bottom half of the strings, and cut them right off.
And that’s OK.
Just because you have six strings, doesn’t mean you have to play them all.
Did you ever see anyone use all 88 keys of a piano at once?
Here’s a video of what that chord looks like:
Once you get comfortable with that version, try incorporating your fourth finger for a fuller sound.
You might not be used to using your pinky, and it can be hard to get that finger to do what you want to, but most people can learn this version within five to ten minutes.
You’re going to basically add another note on the fourth string, right on the fourth fret, where your third finger was already. But we’re going to flip our third and our fourth fingers.
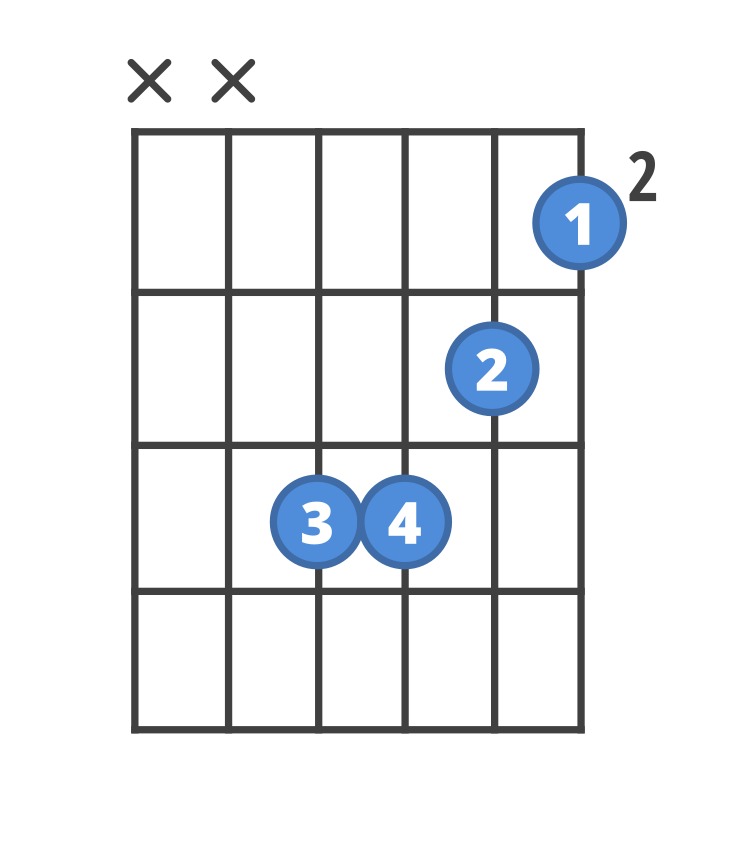
Tip: When two fingers are playing on the same fret, the thicker finger usually goes on the thicker string.
Here is this version, next to the other two we’ve looked at already:


As you can see, we’re getting closer to the barred version–just one string different!
Here’s what it looks like on your fretboard:
This version should last you a while—go ahead and start playing this version in your songs, begin learning other chords, and come back to learn the barre version later.
Just make sure you only strum the highest four strings!
When you’re ready, it’s time to start to learn how to actually make the barre.
Here’s the diagram, one more time:

First take your first finger, and put the tip on the fifth string, just behind the second fret.
Then, flatten out your knuckle.
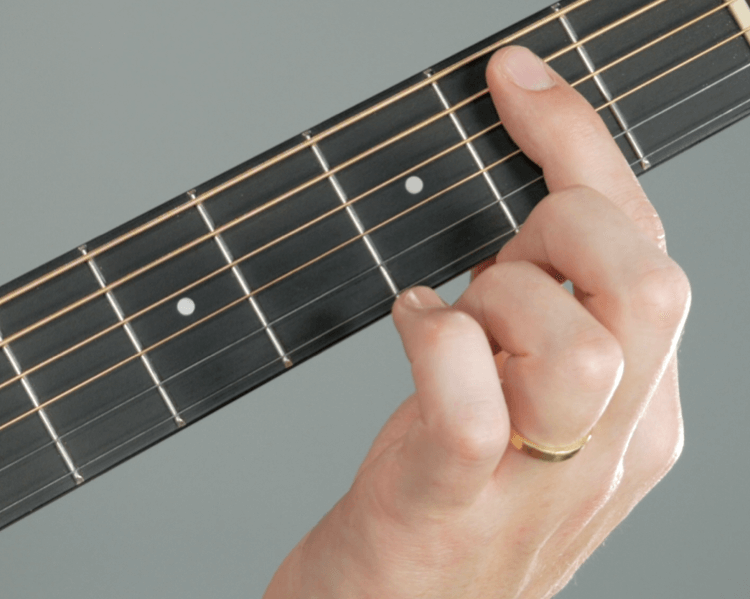
Now that the barre is in place, we’re actually going to put the rest of our fingers in the same places that we did for the easy version.

The only difference is that, instead of fretting just the first fret like our easy version was, our first finger is now fretting all the way across the highest five strings.
Play the top five strings. Congratulations on what may be your very first barre chord.
This can get a little buzzy, but don’t give up. Practice makes perfect, here.
And, whatever you do, don’t stop playing guitar because you’re having trouble with the barre. Just play the easier version until you’re ready to move to this one.

Do barre chords scare you? They don’t have to.
We have an excellent video series by Anna Freitas that will demystify Barre Chords once and for all.
You’ll learn to play the most important barre chord shapes, with tips for finding your way up and down the fretboard, changing chords, and getting rid of that awful fret buzz that plagues beginning players.
Here are some direct links to ChordBank’s practice drills and games for beginners learning the Bm chord.
To learn chords, you’ve got to play them, get them stuck in your muscle-memory.
Learning to change cleanly between chords as you learn is such an important step on your journey from someone who has a guitar, to someone who plays the guitar.
These flashcards will help you do just that.
A good way to get a feel for the Bm chord is to play it alongside the Am chord that it’s related to.
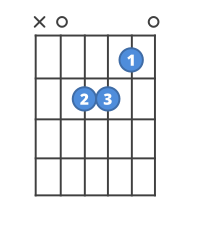
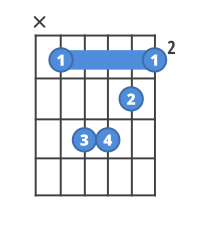
This will help you start to think of these barre chord shapes as what they are: movable versions of the chords you already know.
Try mixing Bm with other chords commonly found alongside it: the D, G major, and A chords.


Try playing ChordPOP! or Blackjack while taking your fingers on and off the strings. ChordBank will listen to your iPhone’s microphone, and fire darts, place bets, or deal cards as you play.